
Team Management Guide
This guide covers how to manage your team in Optivation, including inviting members, managing permissions, and using the team directory.
Overview
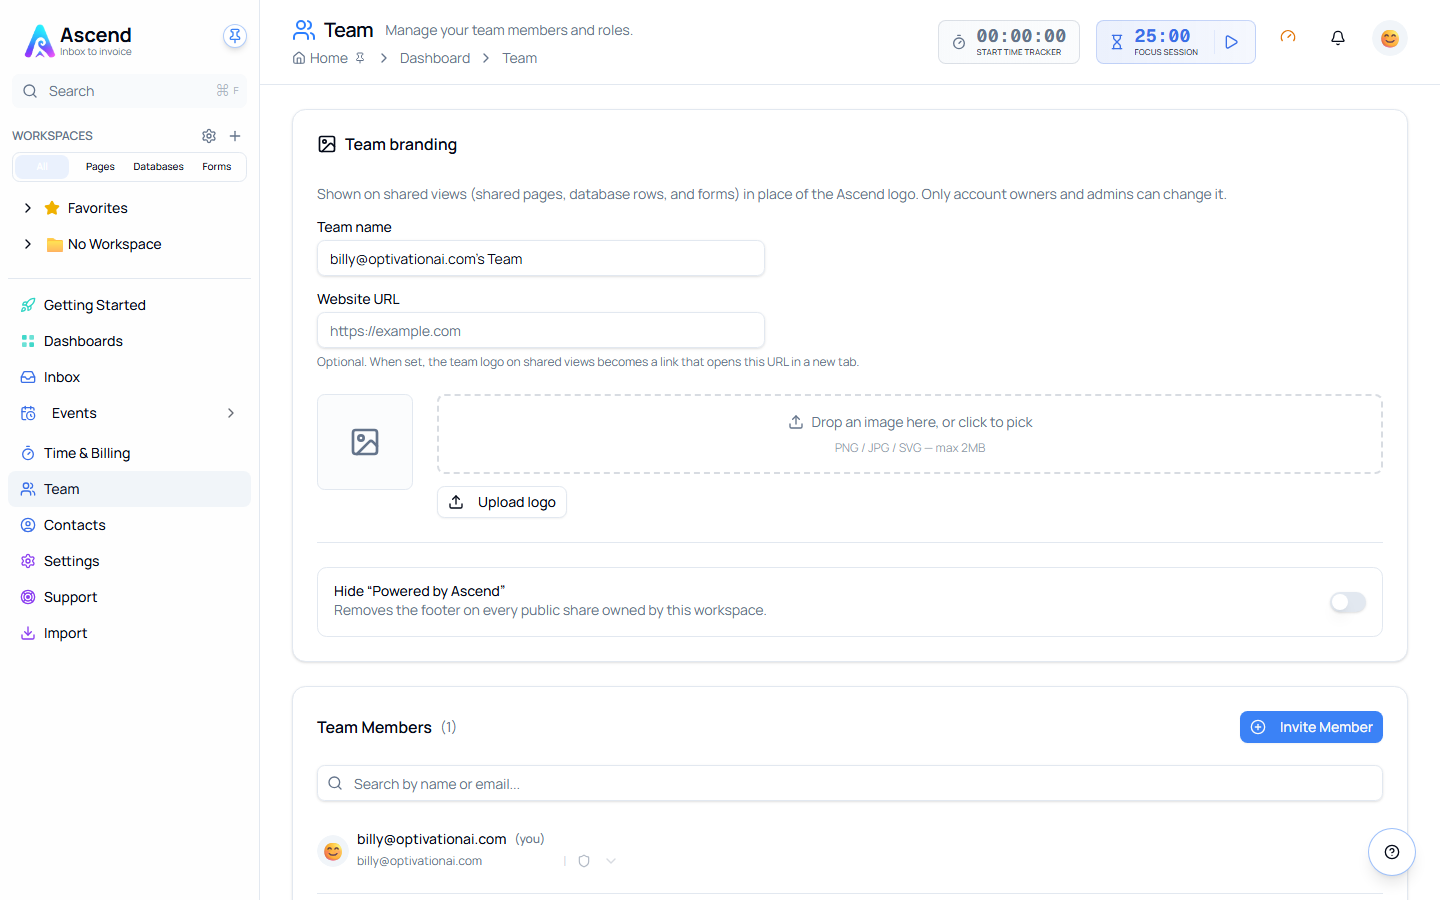
The Team Settings page (/dashboard/team) is your central hub for managing your organization's members and basic settings. From here, you can invite new users, manage roles, and configure the team's timezone.
General Settings
Admins and Owners can update the team's core settings at the top of the Team Settings page:
- Team Name: The display name of the team, visible when selecting teams and shown next to your logo on shared views.
- Default Timezone: Controls how dates and times are formatted on rendered documents, such as Invoices. By default, this is set to UTC. It is important to select your local timezone (e.g.,
Pacific/Auckland) so that dates on generated invoices match your actual day of operation.
Team Branding
The Team Branding card lets Admins and Owners customize how your team appears on every shared view — shared pages, database rows, and forms (both public form URLs at /f/{slug} and token-gated shares at /shared/{token}). When a logo is set, it replaces the default Optivation wordmark in the top-left of each shared view's header, and your Team Name appears next to it.
Who can change it
- Team Owners and Team Admins can upload, replace, or remove the logo and edit the Team Name and Website URL.
- Members see the current branding values but can't edit them.
Both the upload endpoint and the save endpoint enforce this — non-admins get a clear error even if they somehow reach the form.
Fields
- Team name: Required. Used next to the logo on shared views and for team selection within Optivation.
- Website URL: Optional. When set, the team logo on every shared view becomes a link that opens this URL in a new tab. Leave blank to keep the logo non-interactive.
- Team logo: Optional. PNG, JPG, or SVG up to 2MB. Appears in place of the Optivation wordmark on all shared views.
Only http:// and https:// URLs are rendered as clickable links — other schemes are silently ignored for safety.
Uploading a logo
- Navigate to Team Settings.
- In the Team branding card, drag an image onto the upload zone — or click it to pick a file.
- The logo uploads and is saved automatically. The preview updates immediately; no page refresh needed.
To replace the logo, drop or pick a new file — the previous blob is automatically deleted from storage and the replacement is set in one step.
To remove the logo entirely, click Remove. The logo is cleared and the blob is deleted from storage; your team's shared views fall back to the default Optivation wordmark.
What shared viewers see
- Branded team, no website URL set — logo + team name appear side-by-side at the top-left. They're non-interactive (no click-through).
- Branded team, website URL set — same layout, but the whole left strip is a link that opens your website in a new tab (
target="_blank" rel="noopener noreferrer"). - No custom branding — default Optivation wordmark links to the Optivation dashboard.
The footer of every shared view retains a small "Built with Optivation" attribution regardless of your team's branding — this can't be hidden.
Inviting New Members
Administrators and Owners can invite new users to join the team.
- Navigate to Team Settings via the sidebar.
- Click the Invite Member button.
- Enter the email address of the person you wish to invite.
- Select their starting role:
- Member: Standard access to team resources.
- Admin: Full control over team settings and billing.
- (Optional) Configure granular permissions for specific workspaces.
- Click Send Invitation.
The user will receive an email with a unique link to join your team.
Pending Invitations
If a user hasn't accepted their invitation yet, they will appear in the Pending Invitations card.
- Resend: Click "Resend" to send the invitation email again.
- Revoke: Click the Trash icon to cancel the invitation and invalidate the link.
Access Groups
Streamline permission management by organizing users into Access Groups (e.g., "Engineering", "Marketing").
- Navigate to Team Settings.
- Locate the Access Groups card below the invitation section.
- Click Manage Groups to create new groups or edit existing ones.
For a complete walkthrough, see the Access Groups Guide.
The Team Directory
For teams with many members, the Team Directory provides powerful tools to find who you're looking for.
Search
Use the Search bar at the top of the list to find specific members. The list filters in real-time as you type, matching against:
- Name: Display name of the user.
- Email: Email address associated with the account.
Note: If your search returns no results, try checking for typos or searching by a different part of the name.
Pagination
To keep the interface clean and performant, the member list is paginated:
- Default View: Displays 5 members per page.
- Navigation: Use the Previous and Next buttons at the bottom right to browse through the list.
- Page Indicators: See exactly which page you are on (e.g., "Page 1 of 3").
- Search Interaction: The list automatically resets to the first page whenever you change your search query.
Member List Details
Each entry in the member list shows:
- Avatar: The user's profile picture or initials.
- Name: Their display name.
- Email: Their email address (hover to see full address if truncated).
- Role: their current role (Member/Admin).
Managing Roles and Permissions
Admins have full control over user access.
Changing Roles
- Locate the user in the Team Directory.
- Click the dropdown next to their current role.
- Select the new role (Account Admin or Team Member).
- Note: You cannot demote the last remaining Admin.
Removing Members
- Click the Trash icon (destructive action) next to the user's row.
- Confirm the action in the dialog window.
- The user will lose access to all team resources immediately.
Admin vs. Member View
- Admins/Owners: See the full Team Settings page, including Invite buttons, Pending Invitations, Billing, and granular permission controls.
- Members: See a read-only list of their teammates. They cannot invite new users or see billing information.