
Invoicing
Generate an invoice from your tracked time, publish it to your client's portal, and follow it through to paid.
Invoices are built from customisable Word templates and export as PDF or DOCX, with a line-item breakdown drawn from the entries you select.
Before you start
You need at least one invoice template uploaded before generating invoices. See the Templates guide to get set up.
Timezone Warning: Ensure your team's Default Timezone is configured correctly in Team Settings. This determines how your invoice issue dates and tracked time boundaries are formatted on the final PDF.
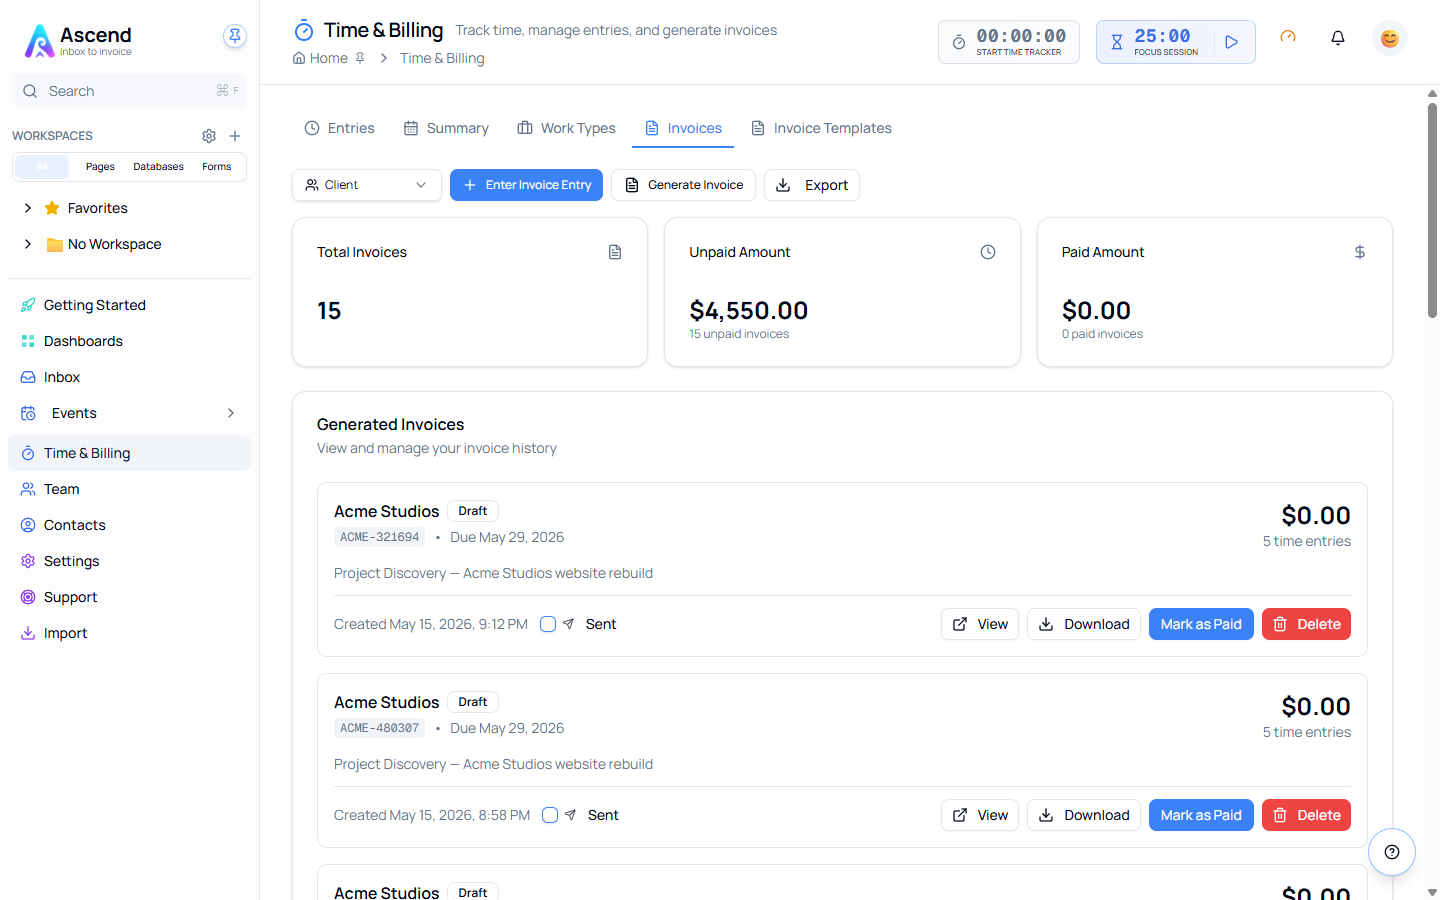
Generating an Invoice
The invoice wizard is a 3-step process.
Step 1 — Template & Client
- Go to the Invoices tab in Time Tracking
- Click Generate Invoice
- Select a template, client, and billing period (start/end date)
- Click Next: Select Entries
Step 2 — Select Time Entries
Review and choose which unbilled entries to include. This list includes both tracked time and any flat fee entries recorded for the client — flat fee rows show quantity × unit price in place of hours @ rate.
| Selection | How |
|---|---|
| All entries | Use the All Items checkbox |
| All entries for a job | Check the job header |
| Individual entries | Check/uncheck each row |
The summary bar at the top shows: selected entry count, total hours, and total amount.
Step 3 — Invoice Details
Review your invoice in a two-column layout before generating.
| Column | Fields |
|---|---|
| Left | Summary (entries / hours / amount), Invoice Number, Payment Terms |
| Right | Client Name Override, Client Address, Notes |
Invoice Number
Auto-generated from your configured pattern. Displayed in a monospace field — edit to override, or click Reset to regenerate.
Click Generate Invoice — the PDF opens automatically.
Sending the Invoice
A generated invoice sits in your list as a draft until you publish it.
Publish it to the client's portal
Tick Mark as sent on the invoice. That publishes it to the client's portal and makes it payable.
Marking as sent does not email anyone
Publishing puts the invoice in the client's portal. It sends no email, so share the portal link with your client yourself.
If the client has no portal yet, create one from the Create New menu and choose Client Portal. Optivation builds the page with an Invoices section already in it, ready to share.
Let them pay it online
With Stripe connected and online payments switched on, a sent invoice carries a Pay button in the portal and your client can settle it by card. The money goes straight into your own Stripe account, and the invoice marks itself paid once the payment clears.
Setting that up takes two steps, both covered in their own guides:
- Connect your Stripe account under Settings → Getting paid.
- Switch on online invoice payments and share the portal link.
Online payment is a paid-plan feature. On Free, sent invoices show your own payment instructions in the portal instead of a Pay button.
Or record a payment yourself
Paid by bank transfer, cash, or a card machine at your end? Click Mark as Paid on the invoice. Online payment sits alongside this rather than replacing it, and an invoice marked paid by hand is treated no differently from one paid through the portal.
Managing Invoices
Invoice List
The Invoices tab shows all generated invoices with: invoice number, client, date, amount, payment status, and a download link.
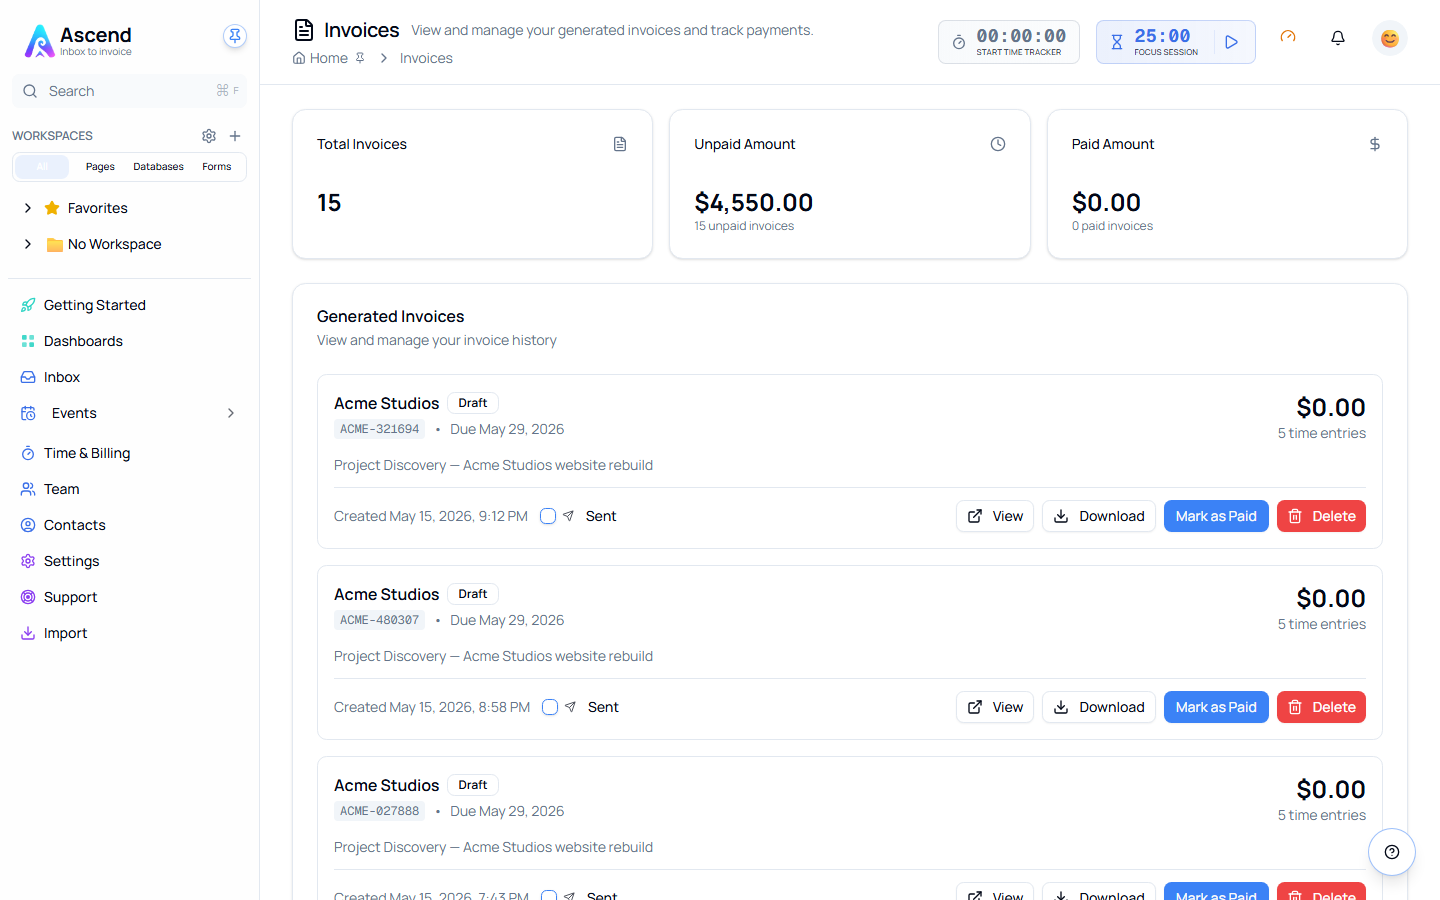
Actions
| Action | How | What it does |
|---|---|---|
| View / Download | The buttons on any invoice row | Opens or saves the PDF |
| Mark as sent | Tick the checkbox on the invoice row | Publishes it to the client's portal and makes it payable. Emails nothing |
| Mark as Paid | Click Mark as Paid | Records payment you took yourself |
| Mark Unpaid | Click Mark Unpaid on a paid invoice | Reverses the above, for a refund or a mistake |
| Delete | Click Delete → confirm | Removes the invoice |
An invoice paid online marks itself
When a client pays through the portal, the status changes on its own and the person who created the invoice gets an email. There is nothing to tick.
Deleting an invoice
Deleting an invoice does not delete the time entries. They become unbilled again and can be included in a future invoice.
Invoice Templates
Templates are Word (.docx) files with placeholder tags that get replaced at generation time.
Available Tags
| Tag | Replaced with |
|---|---|
{client_name} | Client's name |
{invoice_number} | Invoice number |
{invoice_date} | Invoice date |
{date_range} | Billing period (e.g. Jan 1 – Jan 31, 2024) |
{total_hours} | Total hours billed |
{total_amount} | Total amount due |
{#time_entries_table}...{/time_entries_table} | Repeating table of line items |
Flat fee line items on the PDF
A flat fee entry's line item shows its quantity and unit price in the Hours/Rate columns instead of tracked hours and an hourly rate. The line total is unaffected either way.
See the Templates guide for detailed setup instructions.
Invoice Number Settings
Access via the gear icon on the Invoices tab.
Pattern Templates
| Pattern | Example | When to use |
|---|---|---|
| Basic | INV-0001 | Simple, most common |
| Date-Based | INV-2026-02-0001 | Monthly tracking |
| Year Only | INV-2026-0001 | Annual tracking |
| Client-Based | INV-ACME-0001 | Multi-client billing |
| Client + Date | INV-ACME-2026-02-0001 | Client + period |
| Date + Client | INV-2026-02-ACME-0001 | Date-first preference |
| Full Date + Client | Inv-20260301-LC | No counter, date + code |
| Compact | INV260001 | Short, no separators |
| Custom | Fully configurable | Full control |
Configuration Options
| Option | Description |
|---|---|
| Prefix | Text at the start (e.g. INV, Invoice) |
| Separator | Character between parts (e.g. -) |
| Date Format | Tokens: YYYY, YY, MM, DD |
| Client Code Length | Auto-extracted fallback length (1–5 chars) |
| Client Code Uppercase | Force uppercase |
| Include Sequential Number | Toggle the incrementing counter |
| Number Padding | Digit count (e.g. 4 = 0001) |
| Next Number | Override the next value |
| Counter Reset Period | Never / Monthly / Yearly |
Client Codes
Client-based patterns resolve codes in this order:
- Explicit code — set on the contact record (e.g.
ACME) - Auto-extracted — derived from the client name (e.g.
Acme Corp→AC)
To set an explicit code: edit the contact → fill in the Client Code field.
Common Workflows
Monthly Client Billing
- Review the previous month's time entries
- Set date range to first–last day of previous month
- Select client and review line items
- Generate invoice and send with payment terms
Project-Based Billing
- Filter entries by the project job
- Set custom date range (project start → end)
- Generate final invoice on project completion
Retainer Billing
- Track all time as normal
- At period end, compare total hours against retainer
- Generate invoice for the agreed amount (or overage)
Troubleshooting
| Problem | Check |
|---|---|
| Invoice generation fails | Template uploaded? Date range includes entries? Network OK? |
| Time entries missing | Correct date range? Entries already invoiced? Job linked to client? |
| Template placeholders not replaced | Exact {tag_name} syntax? File is .docx? Try re-uploading. |
| Client can't see or pay the invoice | Marked as sent? Portal shared with comment or edit access? See payment troubleshooting |
Related
- Connecting Stripe — Let clients pay invoices by card
- Online invoice payments — Switch on the Pay button and share the portal
- Where the money goes — Settlement, fees, refunds and disputes
- Payment troubleshooting — When a client can't pay
- Templates — Upload and manage invoice templates
- Time Entries — Review entries before invoicing
- Managing Jobs — Set up billing rates
- Troubleshooting — Common issues